Intro
OpenTAKServer (OTS) is yet another open source TAK Server for ATAK, iTAK, and WinTAK. OTS’s goal is to be easy to install and use, and to run on both servers and SBCs (ie Raspberry Pi).
Documentation
Server Setup
Server Instance – Ubuntu 22.04
- Login and root and create a new atak user
- useradd atak
- Create a password
- Change password – passwd
- Verify all information
- Make the atak user a sudo/admin
- usermod -aG sudo atak
- exit
- Will exit the root user
- Login as the atak user
- sudo apt-get install curl
- curl https://raw.githubusercontent.com/brian7704/OpenTAKServer-Installer/master/ubuntu_installer.sh | bash –
- Do not install Zero-Tier
- Install Mumble
- Record password
- Wait for installation to be complete
Login
- administrator / password
Server LetsEncrypt
- sudo apt install certbot
- sudo systemctl stop nginx
- sudo certbot certonly –standalone –preferred-challenges http -d atak1.teamhostile.com
- sudo nano /etc/nginx/site-enabled/ots_certificate_enrollment
- Change the following two lines
- ssl_certificate /home/your_username/ots/ca/certs/opentakserver/opentakserver.pem;
- ssl_certificate_key /home/your_username/ots/ca/certs/opentakserver/opentakserver.nopass.key;
- To this
- ssl_certificate /etc/letsencrypt/live/atak1.teamhostile.com/fullchain.pem;
- ssl_certificate_key /etc/letsencrypt/live/atak1.teamhostile.com/privkey.pem;
- Change the following two lines
- /etc/nginx/site-enabled/ots_https
- Change the same two lines only under the first server header for port 443
- ssl_certificate /home/your_username/ots/ca/certs/opentakserver/opentakserver.pem;
- ssl_certificate_key /home/your_username/ots/ca/certs/opentakserver/opentakserver.nopass.key;
- To this
- ssl_certificate /etc/letsencrypt/live/atak1.teamhostile.com/fullchain.pem;
- ssl_certificate_key /etc/letsencrypt/live/atak1.teamhostile.com/privkey.pem;
- Change the same two lines only under the first server header for port 443
- systemctl start nginx
Server Firewall Notes
Forward ports 80 and 443 to the OTS Server.
https://letsencrypt.org/docs/allow-port-80
Client Setup
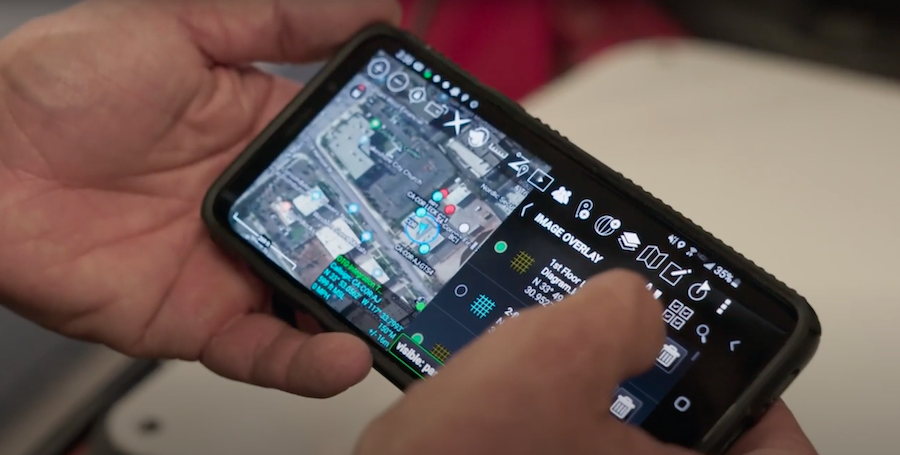
ATAK – Android
App Download
ATAK-CIV – https://play.google.com/store/apps/details?id=com.atakmap.app.civ&pli=1
App Setup
- After downloading the app, open the ATAK app
- Select the Menu in the upper right corner
- Select Settings
- Select Network Preferences
- Select TAK Servers
- Select the Menu in the upper right corner
- Select Add
- Name – ATAK1
- Address – ATAK1.teamhostile.com
- Use Authentication
- Username – Enter the username provided
- Password – Enter the password provided
- Enroll for Client Certificate
- Select Ok at the bottom
- Select Add
- Verify the server connects
- If the server does not connect, see your Team Leader
- Back out of the settings to the map screen
Data Package Download
- Once connected you must download the Data Package for markers and maps
- Select the Menu in the upper right corner
- Select Data Packages
- Select the Download icon
- Select the ATAK1 server
- Download the Data Package specified by your Team Leader
Select the Map Overlay
- Select the Map icon
- Select Mobile
- Scroll down to USGSImageryOnly
ITAK – Apple/iOS
App Download
iTAK – https://apps.apple.com/us/app/itak/id1561656396
App Setup

- After downloading the app, open the iTAK app
- Select the Gear in the upper right corner
- Select Network
- Select Servers
- Select the + in the lower right corner
- Select Scan QR
- Scan the server’s QR Code
- ATAK1.teamhostile.com
- Scan the server’s QR Code
- Use Authentication
- Username – Enter the username provided
- Password – Enter the password provided
- Select Scan QR
- Verify the server connects
- If the server does not connect, see your Team Leader
- Back out of the settings to the map screen
Data Package Download
- Once connected you must download the Data Package for markers and maps
- Select the Packages from the lower menu
- Select the + in the lower right corner
- Select Download from Server
- Select the ATAK1 server
- Download the Data Package specified by your Team Leader
Select the Map Overlay
- Select the Gear in the upper right corner
- Select Map Source
- Select Apple – Hybrid
WINTAK – Windows
App Download
WinTAK – https://www.civtak.org/2020/09/23/wintak-is-publicly-available/
App Setup
Before setting up WinTAK you must login to the TAK Server and download your credentials package.
- Login to the TAK Server and select Data Packages
- Download the Administrator_Config.zip
- After downloading the file, open the WinTAK app
- Select the Menu in the upper left corner
- Select Settings
- Select Import Manager
- Select Import Files
- Select the file you downloaded from TAK Server
- Verify the server connects
- If the server does not connect, see your Team Leader
- Back out of the settings to the map screen
Data Package Download
- Once connected you must download the Data Package for markers and maps
- Select Data Packages from the top menu
- Select the Open Folder icon
- Select the Data Package on the USB specified by your Team Leader
Select the Map Overlay
- Select the Map icon
- Select Mobile
- Scroll down to USGSImageryOnly
Client Tutorial Videos
ATAK Tutorial Series